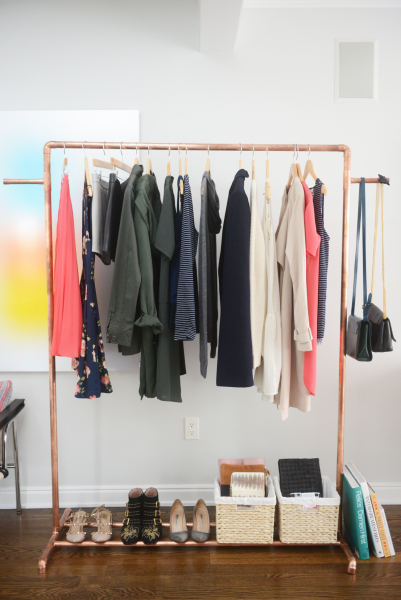
When we moved offices, I no longer had enough space to keep a stable of clothes out in plain view. I missed the inspiration that it provided (not to mention a reminder to fall back in love with some lesser-worn items) and decided it was time to bring the rack back for the Cupcakes and Cashmere clothing line. I spent far too many hours in search of the perfect minimal-yet-functional rack – I need a place to put shoes and hooks for my purses – and the ones I found were either too simple, or exorbitantly expensive. So, I set out to make my own. Armed with a little bit of elbow grease, I built this copper clothing rack in under an hour. I’ve created a diagram to help you along so you can make your own copper rack at home.

Items You’ll Need
Two 5-foot long pipes (for sides).
One 4-foot long pipe (for top holding rack).
Two 4-inch pieces (as connectors between tee and elbows at the top)
Four 2-inches pieces (as connectors between tee and elbows at the base)
Four 5-inch pieces (as connectors between tee and elbows at the base)
Total: Thirteen 1-inch thick copper pipe pieces
Two 4-foot pieces (for the bottom shoe rack)
Two 6-inch pieces (for side “hooks”)
Total: Four 3/4-inch thick copper pipes


Some Extras
– Remove any stickers and use a nail buffer to shine the pieces you will be using.
– The elbows should always face down when you’re connecting them.
– An elbow or a Tee will always attach to a pipe.
– Add felt to the base’s legs if you want to protect your wooden floors.
– I chose 6-inch purse “hooks”, but you can change the length according to your preference.