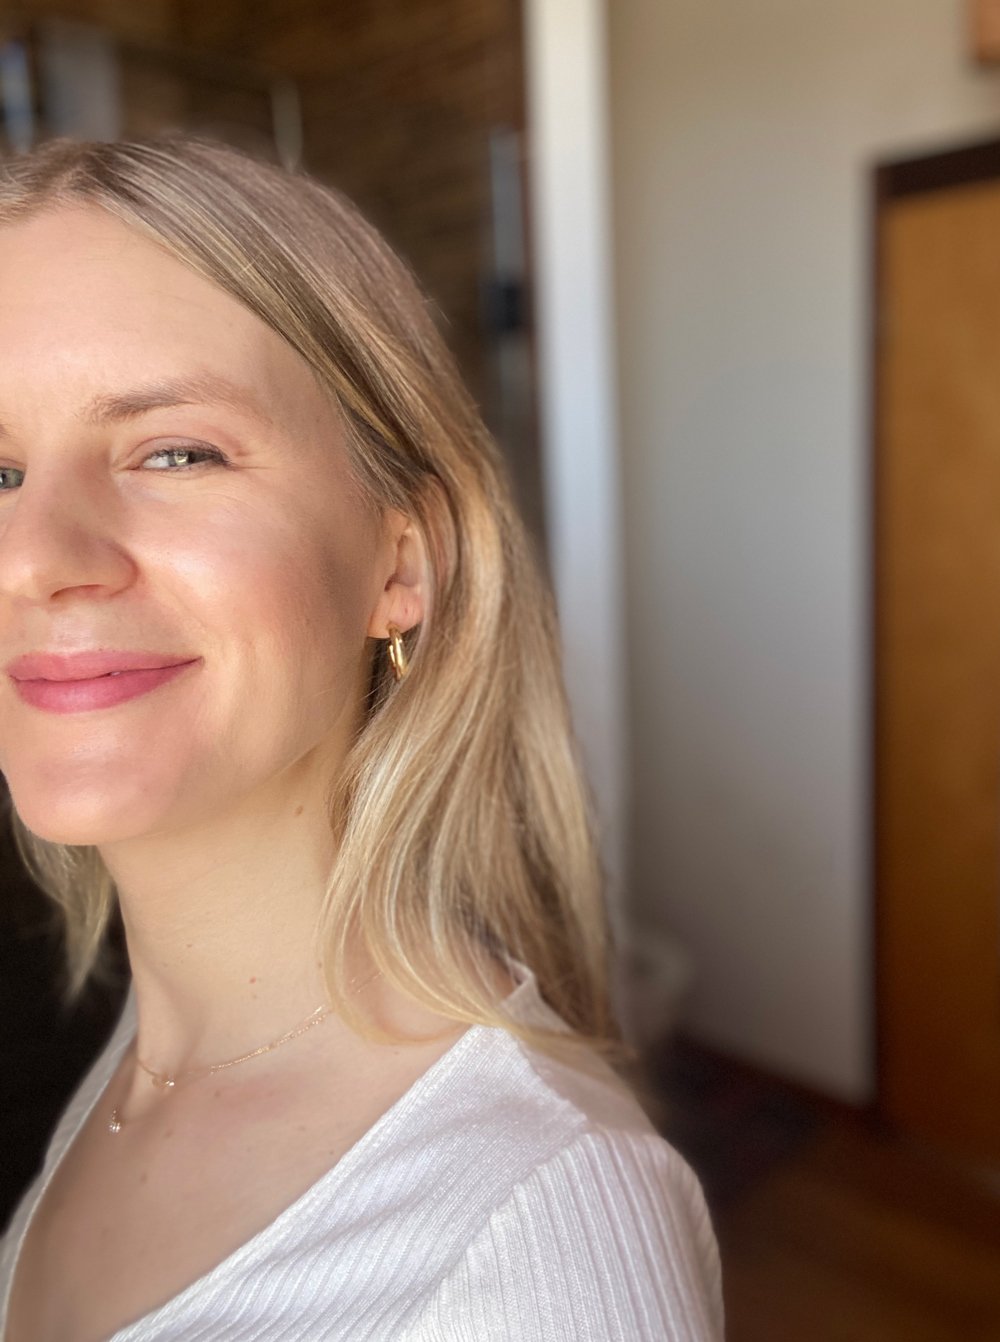
Let me preface this by saying I had a very small wedding, but just like every bride, I wanted to look my best on my special day, and I knew that meant doing my own makeup. While I know that might sound daunting to some, sitting in a chair while someone else applied my makeup sounded much more stressful. I love beauty–I was previously a beauty editor–so applying makeup is something I enjoy. It makes me feel relaxed and happy, which is exactly how I want to feel before walking down the aisle. Don’t get me wrong, just because I love to apply makeup, doesn’t mean I’m an expert. But, thanks to my interest in beauty and a good amount of research, I was able to bring my look to life on the big day.
If you’re thinking about doing your own makeup on your wedding day, scroll down for some of my tips.
1. To do your own makeup or not?
First things first, does the thought of doing your own makeup on your special day intrigue you? If so, then you should absolutely do it. If it stresses you out, then you should hire a makeup artist. However, if hiring makeup is not in your budget, then make a plan and practice. I promise you will get to a place where you feel confident and comfortable doing your own makeup on your big day.
2. Do your research
Once you’ve decided to do your own makeup, scroll through Pinterest, watch YouTube, and pick the look you want to achieve, just remember to be realistic with your makeup skills. When you have the look in mind, try achieving it with your own makeup. You might be surprised to learn that you already have most of what it takes to achieve your wedding day look in your makeup bag. *I only had to purchase foundation and setting powder to bring my look to life.
If you’re attempting a natural, glowy bridal look like me, I found these tutorials here, here, and here helpful. Also, I learn so much from watching Vogue’s Beauty Secrets videos – celebrities have the best tips for photo-ready makeup.

3. Plan and prepare
If you plan to get a treatment of any kind, give it a try three to four months before your big day, this way you can suss out any issues well in advance. I didn’t do any treatments per say, but I did get a very light spray tan a couple days before my wedding, and I was thrilled with the results because I went to someone I’d previously seen.
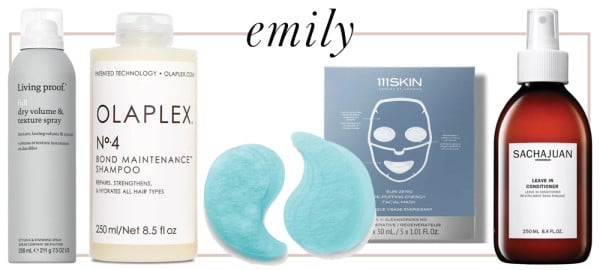
4. Know your skincare
Stick with what you know your skin loves, and use the same skincare products the month of your wedding. Adding in new masks or creams might agitate the skin, or worse cause a reaction. Make sure you’re using an exfoliant the month of your wedding (I love Vitamin C because it’s gentle) as this will make the skin smooth and easy for makeup application. I also recommend having a great moisturizer and lip balm, because there’s nothing better than applying makeup to hydrated skin. My favorite moisturizer under makeup is Charlotte Tilbury’s Magic Cream or Cerave PM, and I love Kosas Lip Fuel.
While my skincare routine didn’t change much ahead of my wedding day, I did start using my face sculpting tools much more consistently. My trusty gua sha and NuFace became a part of my daily routine a few weeks before I walked down the aisle. I also swapped my old eye cream for a more luxurious formula by Skinceuticals to address my dark circles and fragile under eye area

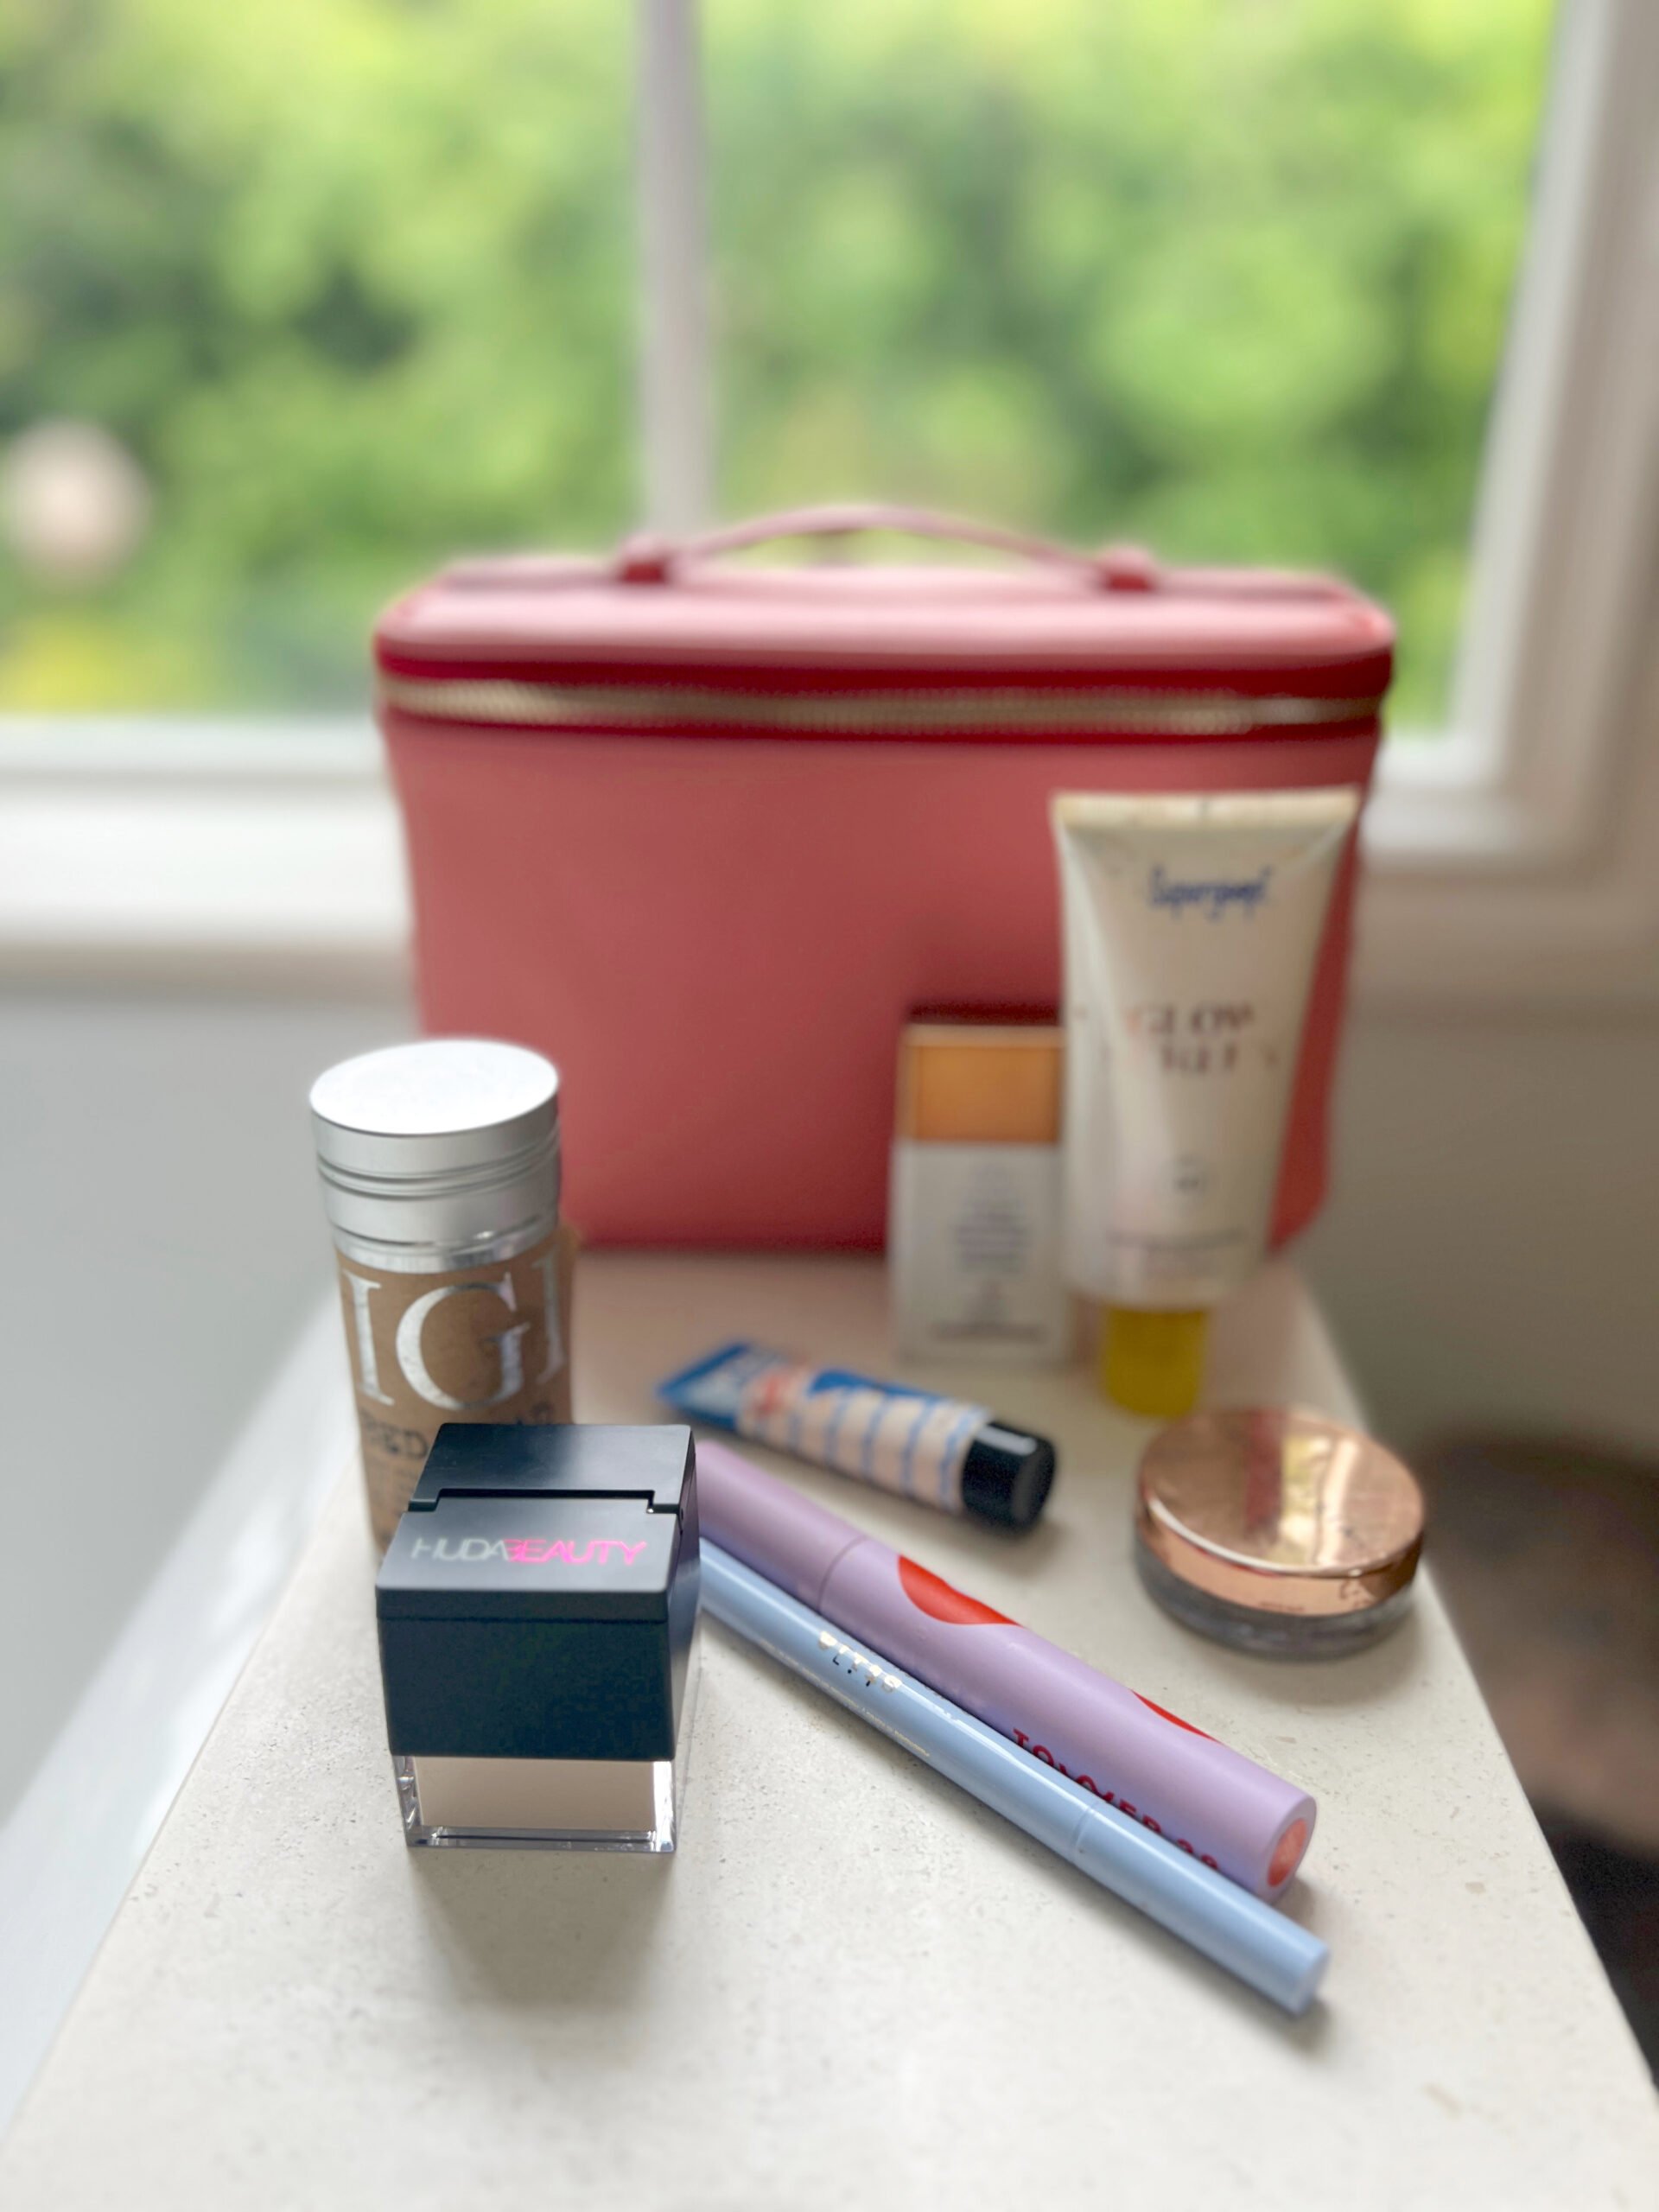
5. Let’s talk makeup
You have your look, but now you need the tools to achieve it. When you select makeup for your wedding day, you have to think about what looks good in person as well as on camera. Here are a few of my tips as well as the products I used to get my look:
Foundation: I opted for a dewy, buildable foundation, Chantecaille’s Future Skin Gel Foundation in shade ‘Porcelain.’ It went on silky smooth, and lasted all night. This foundation is amazing, I still use it for special occasions when I know I’m going to be photographed!
*Photo tip: Do not use a foundation with more than 15 SPF as it can reflect light in photography.
Concealer: Just like your foundation, your concealer should not be light reflective or have SPF in it. I wore my favorite concealer, the famous Shape Tape by Tarte and per usual it lasted from day to night.
Powder: I was worried powder would look cakey or blotchy in photos. So, ahead of my wedding, I did a ton of research and decided on this mini setting powder from Laura Mercier. Following instructions from this article, I applied said powder with a buff (not a brush) under my eyes and on my T-zone. It went on smooth, kept my makeup in place, and made my skin appear nearly flawless.
Bronzer: I love a shimmer bronzer for that lit-from-within-glow. My favorite is Hourglass’ Ambient Lighting Bronzer in ‘Luminous Bronze Light’.
Blush: A few years ago on set, a makeup artist told me that blush, specifically cream blush, is an absolute MUST on camera because it brings the skin to life in a natural looking way. I now exclusively use cream blush. On my wedding day I used the shade ‘Reverence,’ a cool-toned petal pink cream blush from Kjaer Weiss, but I also love Tower 28’s cream blush.
Highlighter: Just like blush, look for a liquid or cream formula, as it will have long lasting results. My favorite highlighter for special occasions and everyday use is ILIA’s Multi-Stick Highlighter in ‘Polka Dots and Moonbeams’.
Eye Makeup: I kept my brows simple, filling them in and brushing them into place with IT Cosmetics Brow Pencil in shade ‘Taupe’ (it’s the perfect shade for blondes). For my eyelids I stuck to my everyday liner, but opted to play with my shadow. I chose NARS’ Eyeshadow Duo in ‘Alhambra’ because the golden hues complimented my eye color and matched my inspiration images.
Mascara: I curled my lashes with my Kevyn Aucoin lash curler, and since I wasn’t using falsies, I applied Dior’s Lash Primer to my eyelashes for an extra bit of volume. To finish off the look, I applied Pacifica’s waterproof mascara – I like this mascara because it’s easy to apply, stays put, and is under $20.
Lips: Just like blush, a pigmented lipstick can bring your look to life. On my lips I wore my favorite Charlotte Tilbury Superstar Lip in ‘Pillow Talk.’ It’s a couple shades darker than my natural lip color, and is a classic shade that I know looks good on me in photos. One caveat, I did have to reapply this lipstick throughout the night. If I had a chance to do it again, I would opt for Chanel’s long lasting, low maintenance lip color, Rouge Duo in shade ‘Light Rose.’
Setting Spray: I didn’t use a primer because I didn’t want to buy a beauty product that I wouldn’t use again (I don’t wear a full face of makeup often). So, instead I prepped my skin and set my makeup with Caudalie’s Beauty Elixir. I already owned this spray so I knew it would keep my makeup fresh, plus I love the smell!

6. Practice makes perfect!
Try out your look before the big day! Busy with wedding plans, and heading to a different city (we had a destination wedding), I didn’t find time to practice my makeup ahead of the wedding. Fortunately for me, my whole life of applying makeup proved to be practice enough. However, if I could do it over again, I definitely would have done a trial run.
7. Take your time
I didn’t want to feel rushed on my wedding day, so I allotted more time than usual to do my makeup. And while natural, glowy skin may seem simple, it does take time to get it right. If you want your skin to look seamless, it’s important to let your layers sink in before applying more makeup, and it’s equally important to blend, blend, blend which can take quite a bit of time as well.
8. Enjoy yourself!
At the end of the day, you will look great because it’s your wedding day. If you’re happy, smiling, and in love, that is going to show in all of your photos. The wedding day glow is real, not just because of highlighter, although I do recommend it.