One of the most documented topics on Cupcakes and Cashmere is my obsession with nail polish. From at-home manicure tips, to nail art inspiration and my own capsule collection with Formula X, no other beauty ritual makes me happier. So, when Formula X reached out and asked if I was interested in trying their new product, The System XCEL, which aims to recreate a gel-like experience at home, I couldn’t wait to try it out.
I love the look and lasting effects of gel manicures, but there are several factors that prevent me from getting them regularly: the cost, the need to return to the salon to have them removed, the fact that they’re not great for your nails, and the potentially damaging UV rays. If there was a way to reap all of the benefits without any of the negatives, I was game. Here’s my take on Formula X’s The System XCEL.
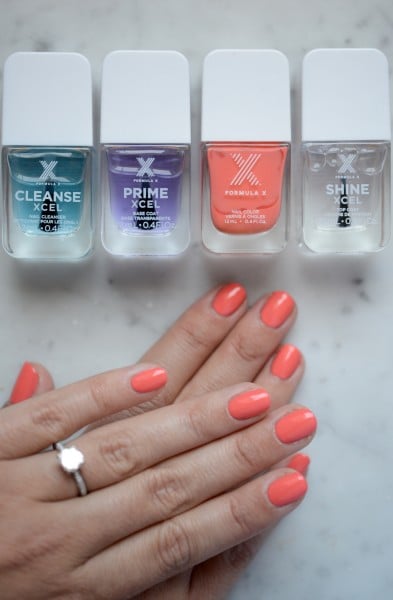
Step 1: Delete All Nail Polish Remover. Everything you need comes in one convenient tub, with several holes punched into the spongy interior, which is soaked in nail polish remover. It’s a much better option than rounding up a handful of cotton pads (which can leave annoying, little stray fibers) and a bottle of nail polish remover to clean each individual nail.

Step 2: Cleanse. In the past, I’d been reluctant to add more steps to my routine since I wanted to simply get my nails painted and then be done. But after using the ‘cleanse,’ (which smells remarkably good) I saw a difference in my nails right away. They’d been slightly dehydrated and yellowish, but this step made the ridges disappear and it dried immediately, so it didn’t add much time to the process.

Step 3: Prime. The base coat glided on nicely and made my nails look clean and smooth. Since natural nails are so big this summer, I was tempted to leave them as-is because they looked fresh and pretty, but wanted to finish the system. I appreciated that the brush is rounded, flexible, and wide, so with one swipe, you can cover the entire nail, making application hassle-free.

Step 4: Polish (in ‘Punch Line’). I chose a bright, neon coral polish, which, after one coat, looked incredible. It deposited a rich, pigmented pop of color and was so streak-free that I could have skipped a second coat. Once I added the second coat however, it became clear just how much of an impact it made: it truly looked as though I’d gotten a gel manicure.


Step 5: Shine. I added the final top coat, which made my polish look glossy, substantial, and luxurious. Beside the shine factor, the final coat also created a strong barrier that made my typical at-home manicure feel much more durable.


Overall thoughts: Per usual, I put my hands to the test, doing everything from playing in the sand at the park to washing dishes and peeling oranges (one of Sloan’s favorite snacks). The polish held up so well (over 10 days) that I eventually had to remove it only because my nails had grown out, with the polish staying intact. It’s safe to say that I’ll now be using this system anytime I do my nails at home.